Common Mistakes to Avoid When Adjusting Coilovers
Common Mistakes to Avoid When Adjusting Coilovers
Blog Article
Installing Coilovers on your car or truck can substantially enhance the ride quality, handling, and overall performance of one's vehicle. If you are seeking to improve your driving knowledge, this information can go you through the steps to set up coilovers properly while ensuring protection and functionality.
What Are Coilovers?
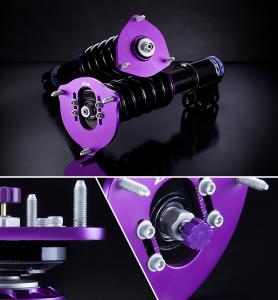
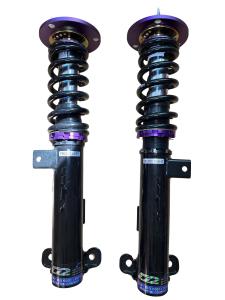
Coilovers are a variety of a coil spring and distress absorber, located together as you component. They let car lovers to regulate the ride top, rigidity, and damping of the car, making them a favorite adjustment for both street and track use. Prior to starting the installation, guarantee you have plumped for the proper coilovers tailored to your car or truck make and model.
Instruments You'll Require
Before you begin, get the mandatory resources to really make the process successful and secure:
Jack and jack stands
Torque wrench
Plug set
Spring converters (if needed)
WD-40 or even a decay penetrant
Plastic mallets and screwdrivers
Double-check your vehicle's specifications and make sure you have every thing needed to accomplish the job.
Step-by-Step Manual to Installing Coilovers
1. Prepare Your Car
Begin by parking your vehicle on a flat, stable surface. Engage the parking brake and assure the port stands are firmly in position to prevent incidents throughout installation. Raise the car using a hydraulic jack and remove the wheels at all four corners.
2. Take away the Previous Suspension
Using your outlet set, find the bolts keeping your current shocks, struts, and springs in place. Apply rust penetrant if products appear hard to loosen. Once the screws are eliminated, you should be able to remove the suspension parts carefully. Hold parts arranged in case you require to appear back for reference.
3. Mount the Coilovers
Arrange the increasing details of the coilovers with the brackets in your car. Secure them set up using the products supplied by the manufacturer. Ensure that you follow the torque specifications that are included with the instructions; over-tightening or causing bolts free can bargain safety.
4. Alter Top and Preload
Most coilovers provide adjustment bands setting experience height and preload. Utilizing the presented instruments, change the adjustments to your ideal measurement, ensuring enough settlement for driveability without compromising performance.
5. Check All Products and Connections
Before concluding up, go over every bolt and connection to ensure they're secure. A free bolt throughout function can cause significant problems on the road.
6. Reinstall Wheels and Check Drive
When the coilovers are installed, position the wheels back on and decrease the car. Take the vehicle for a short test travel to familiarize your self with the brand new setup. Hear for any unusual disturbances and recheck screws after the drive.
Fine-Tuning for Optimal Efficiency
The beauty of coilovers is their adjustability. After installation, spending some time fine-tuning the stiffness, damping, and experience level to accommodate your preferences, whether you prioritize track-level performance or perhaps a relaxed day-to-day drive.
Adding coilovers on your vehicle is really a satisfying task that elevates equally appearance and performance. With this specific guide, you can confidently handle the process and enjoy remarkable handling on every drive. Recall, safety always comes first, so invest some time, double-check every stage, and do not hesitate to consult a specialist if needed. Happy operating!
Report this page